Download
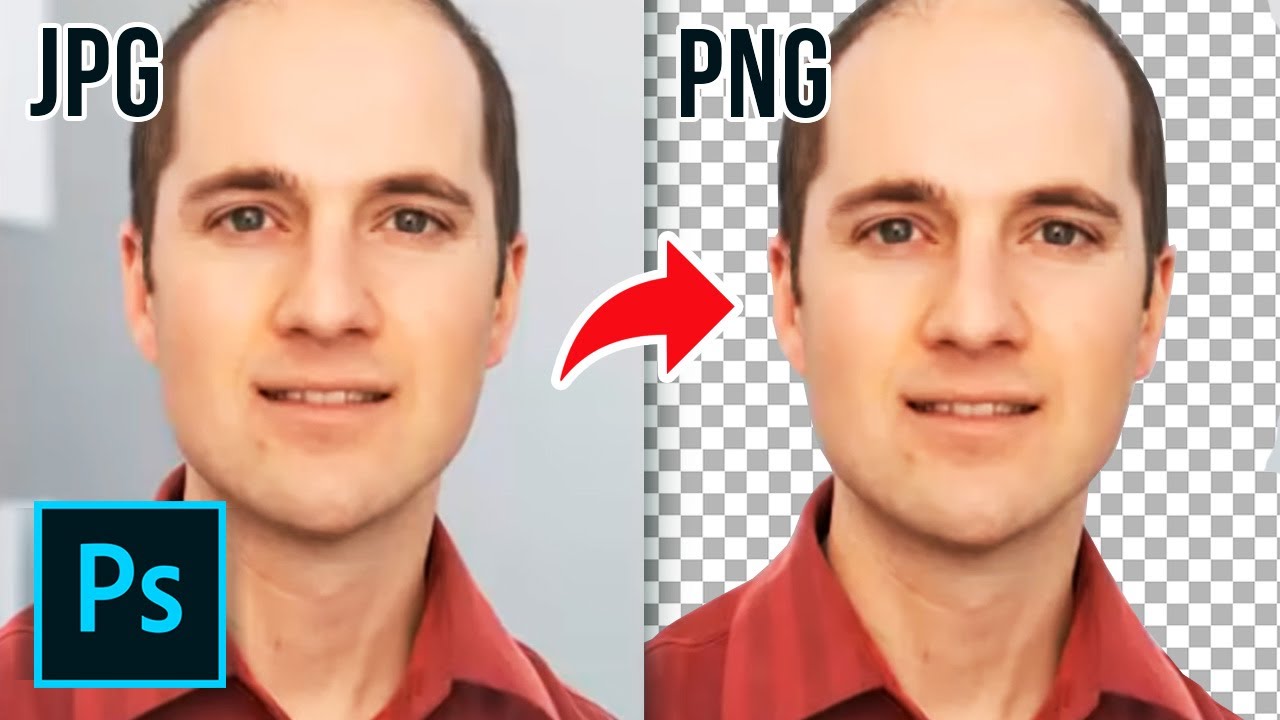
In this tutorial you are going to learn how to make a png image with transparency.
In this tutorial you are going to learn how to make a transparent png.
Step # 1 — Opening the Image
Start Photoshop and load the image that you want to give some transparency to. Here you can see we have a standard jpg image. In the layers panel right click on “Background” and click “Layer From Background”, click “OK” in the dialog box that appears.
Step # 2 — Creating Some Transparency
Now we will delete some of the image so that nothing is left, not even a background – in Photoshop transparency is indicated by a checked pattern. Click on the “Magic Wand Tool” in the menu on the left. Use this to select the part of the image that you want to remove, here we are removing the background to this portrait photograph. Hold down “Shift” and click to select multiple areas. When you have selected everything you want press the “Delete” key. Press “Control” and “D” on the keyboard.
Step # 3 — Saving the File
Now we need to save this file as a png with transparency enabled. Click “File” and then “Save for Web & Devices”. On the right make sure that the “Transparency” box is checked and then click “Save”. Name the photo, choose a location, and click “Save” again.
Step # 4 — Testing the Transparency
To make sure that the transparency has worked, click “File” then “Open” and locate the png file we just created and open it. Press “Control” and “A” then “Control” and “C” and navigate to another image. Press “Control” and “V” and you will see that there is no background where we previously deleted it and that is how to make a transparent png.